The Darkroom Illuminator
In the darkroom, test strips are essential. Even the most sophisticated measurement technology can not replace a subjective image impression. It has been more than a decade since the production of cassettes for exposing test strips of various companies has been discontinued. These devices were expensive and technically inadequate: you got narrow test exposures of different image sections that did not facilitate the viewing in the immediate context just. In addition, just a single test run consumed a whole sheet of photo paper.
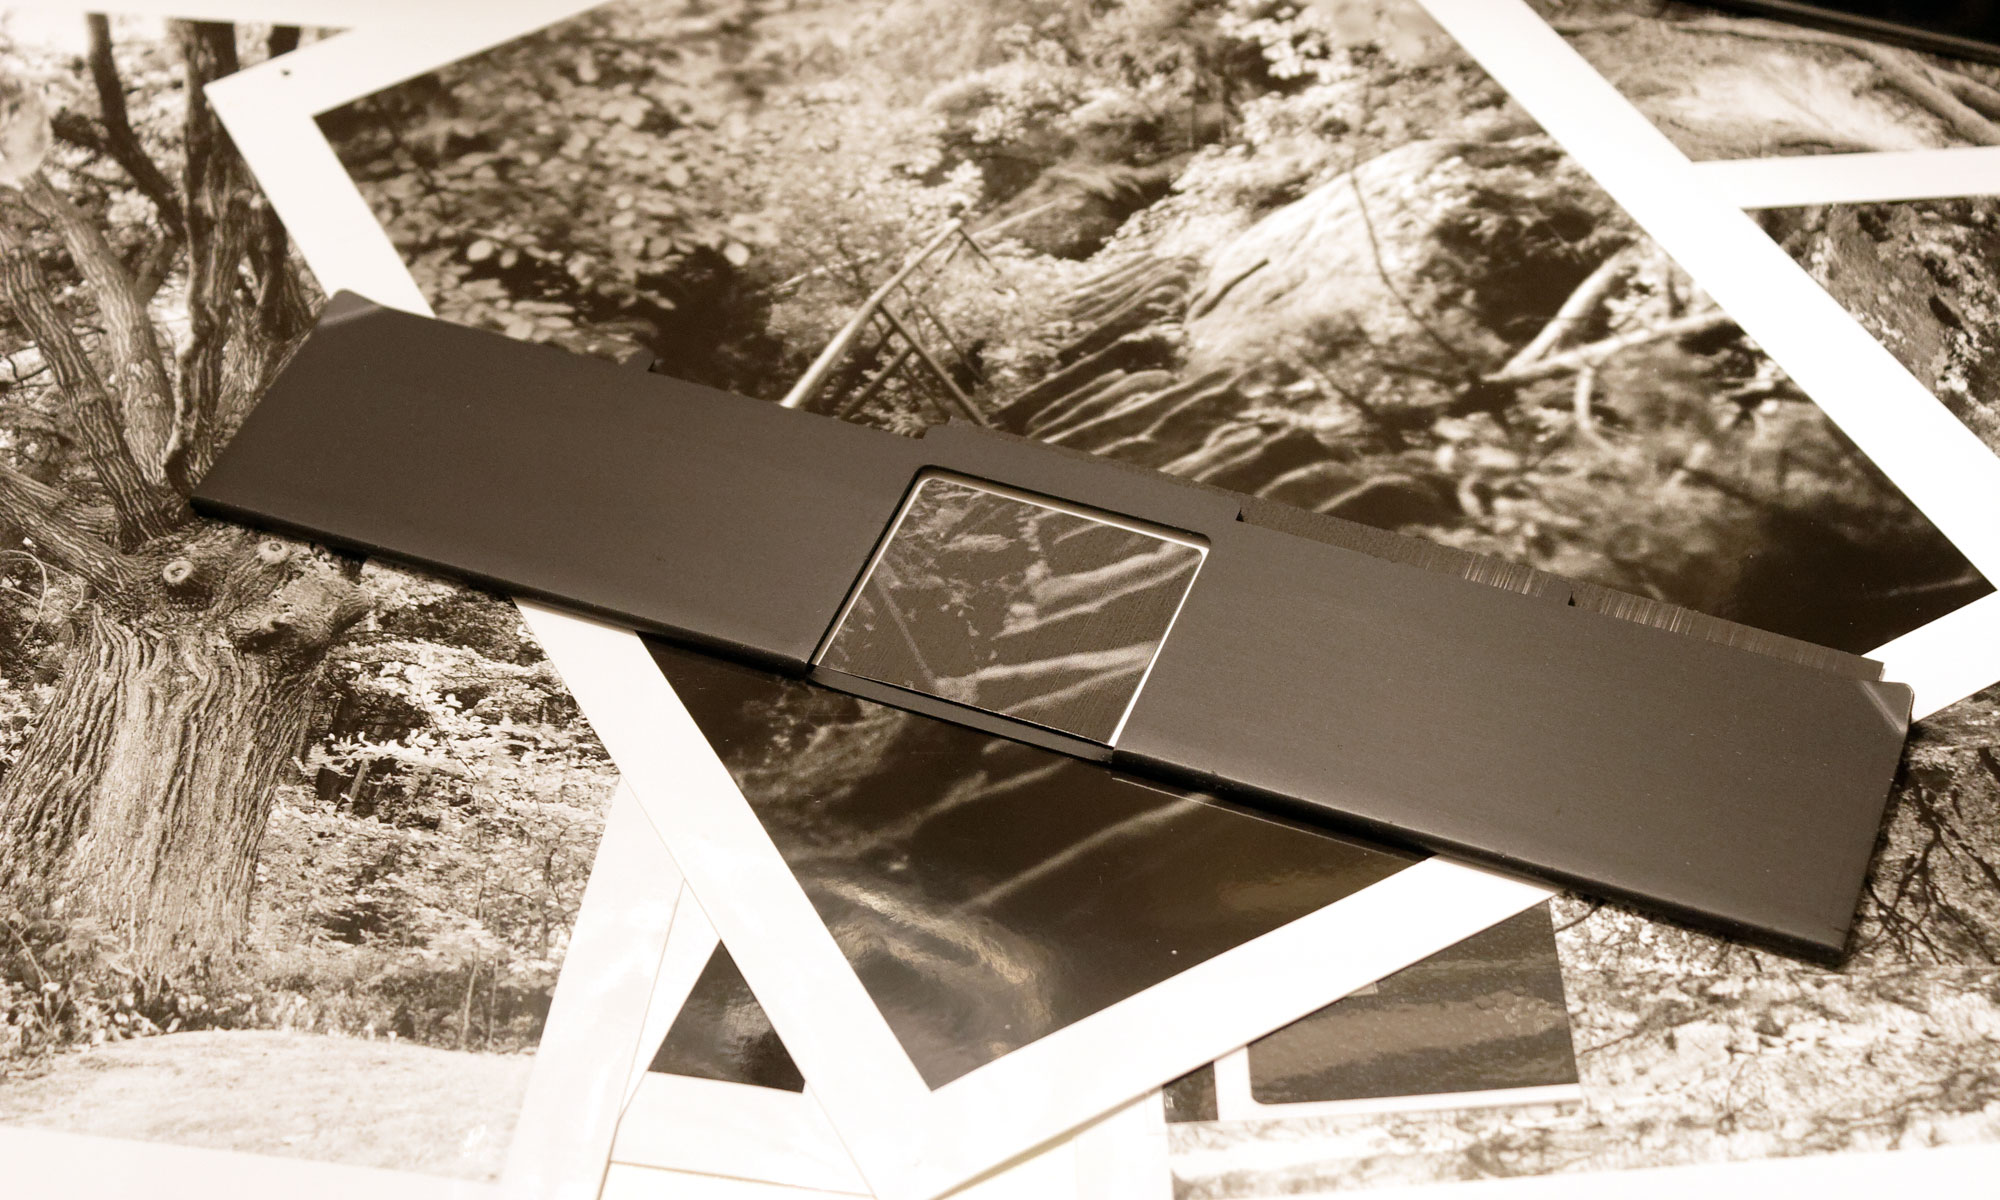
The teststrip exposure system of the CastleLabs, the Testprinta S, takes a different approach and uses the hardware – the exposure slide – as well as the software – the Dynamic Exponential Time Calculator – to available. While the exposure slide uses half a sheet of photo paper and exposes test images from the same frame, the DET calculator ensures that the desired increase in density always increases or decreases linearly. This makes working in the darkroom simple and efficient: if a DET Calculator annoying thinking work is removed, the exposure slide allows the production of 5.5cm x 5cm large test images, which allows a rating even in the larger picture context – with the same image detail.
Please place orders via email vertrieb@castlelabs.de – 24,99 EUR plus shipping.

How to use
- Insert negative into the image stage / enlarger
- Laboratory light off, light of the enlarger on
- Set magnification and sharpness
- looking for negative points to be tested …
- Red filter in front of the magnifying lens
- … and therefore place the exposure sled
- Insert 1/2 sheet 13x18cm photo paper (= 6.5x18cm) over the aperture of the exposure slide, flush with the edge – very easy to feel.
- Light of the enlarger off.
- Remove red filter
- Set the timer with the 1st time suggested by the DET Calculator and start the 1st exposure, then push the paper forward until the next clearly noticeable projection
- Set the timer with the 2nd time suggested by the DET calculator and start the second exposure, then push the paper forward until the next clearly noticeable projection
- Set the timer with the 3rd time suggested by the DET Calculator and start the 3rd exposure, then develop the paper.
The result is the first 3 test images of the same image section with linear density increase.
Evaluation and refinement
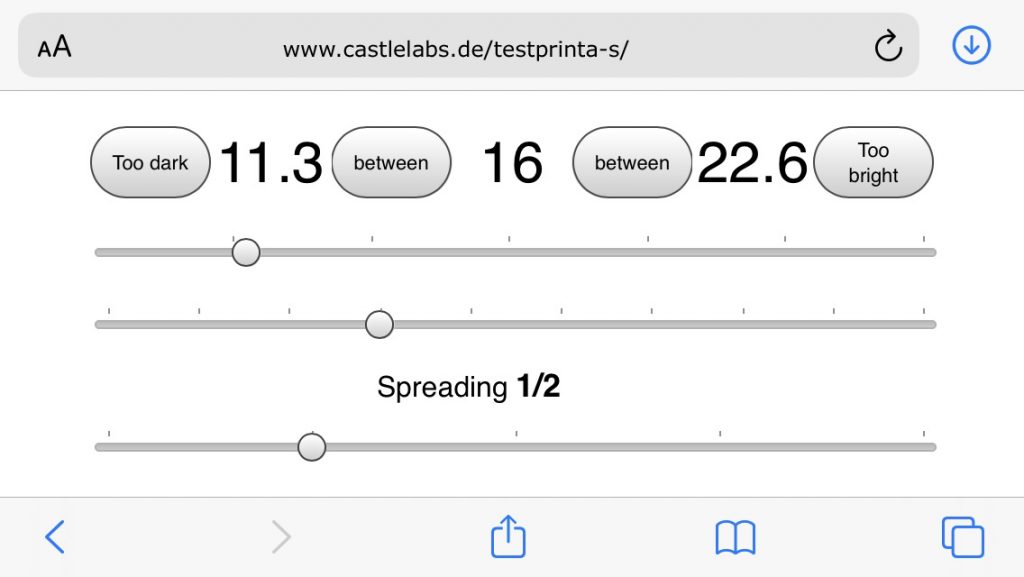
- If the first test image is already too dark, then you type in the DET-Calculator on “too dark” and get three new times for the next test strip. Repeat steps 7 to 12.
- if the 3rd test image is still too bright, then you type in the DET-Calculator on “too light” and get suggested three new times for the next test strip.
Repeat steps 7. to 12. - if the first test image is too dark and the second is too bright, then you type in the DET-Calculator on “between” the 1st and 2nd time and get three finer listed times for the next test strip. Repeat steps 7 to 12.
- If the second test image is too dark and the third is too bright, then in the DET-Calculator you type on between between the 2nd and 3rd time and you get three finer times for the next test strip. Repeat steps 7 to 12.
Example

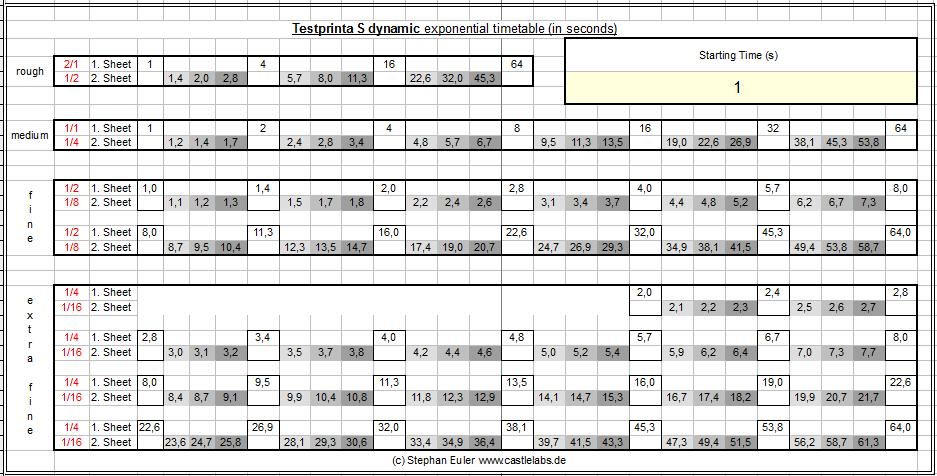
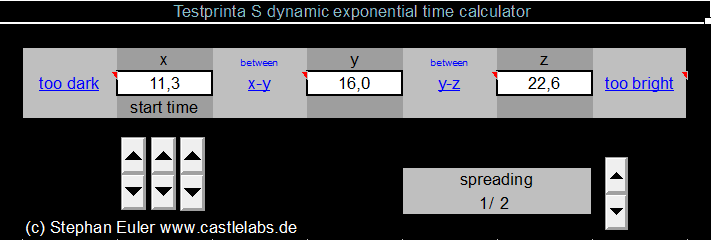
The first test strip in the format 6.5 x 18 cm (1st sheet) shows the rough time frames. Depending on the spread and requirements, this can be larger or smaller. In this case, the spread is 1/2 and maps three times in the range of 11.3 to 22.6 seconds. Either you have the desired result or you can refine with the 2nd sheet by clicking on “between” in the DLT-Calculator: 11,3 / 16,0 or 16,0 / 22,6. Immediately the times fan out. If you now illuminate the 2nd sheet with the finely spread times, then you get together with the 1st sheet five differently exposed test images of the same section with linear density increase in sequence:
- 11,3->12,3->13,5->14,7->16,0 or
- 16,0->17,4->19,0->20,7->22,6
(c) Stephan Euler www.castlelabs.de